For the last two years I’ve been lucky enough to work with a landlord on fixer uppers. He purchases distressed homes, rehabs them and adds them to his rental portfolio. My job is to create a design plan that updates each property by selecting low costs materials that look great and will work in a competitive rental market.

Above, the sign that hangs over the garage, “La Casita” is a ranch style cottage that sits near the original Jane Russell ranch, “La Posada”, in North Hollywood. The house already had some great character with its shiplap paneling, ranch style doors and vintage hardware.
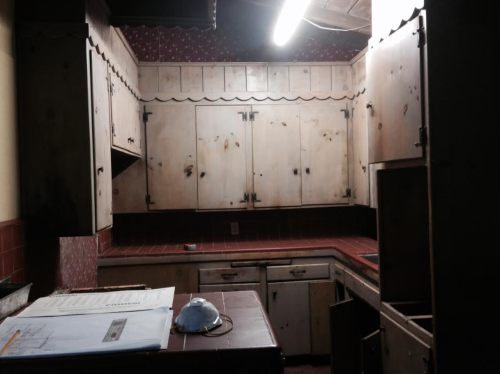
Kitchen, Before
However, when we got our hands on it, it had fallen into true disrepair, as you can see in the photo above. It had dark wallpaper, layers of nicotine on the walls and was your basic “fixer upper”. The kitchen was very tiny and felt even smaller with the dark wallpaper and minimal lighting. By opening up the “L” shaped countertop (in foreground) and relocating the oven area (on the right), we were able to make the space feel a lot bigger without gutting the entire kitchen.

Kitchen, After
Next, we removed the dark wallpaper, added some lighting and painted the cabinets, walls and ceiling. We removed the old linoleum flooring in the kitchen and installed new hardwood flooring to match the rest of the home. We also saved all the kitchen hardware and painted it black to go with the other black accents in the home.

Kitchen to Living, Before

Kitchen to Living, After
As you can see in the picture above, paint played a huge factor in transforming this space. Also, the kitchen wasn’t big enough for an actual island so we relocated the “L” shaped counter to the side, to act much like an island would — a place for people to hang around as food gets prepared, etc.
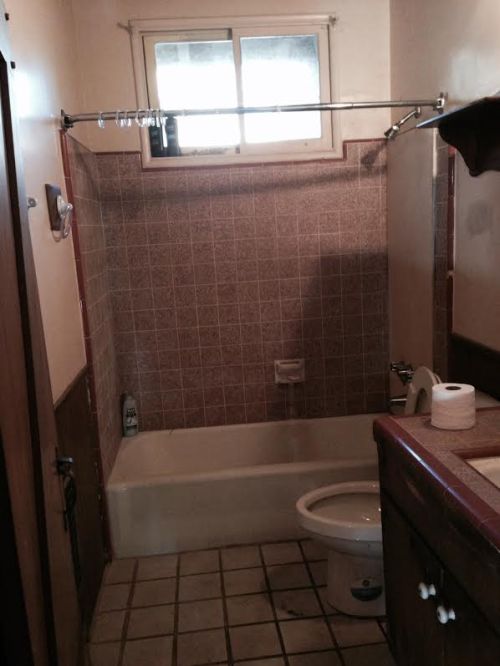
Hall Bath, Before
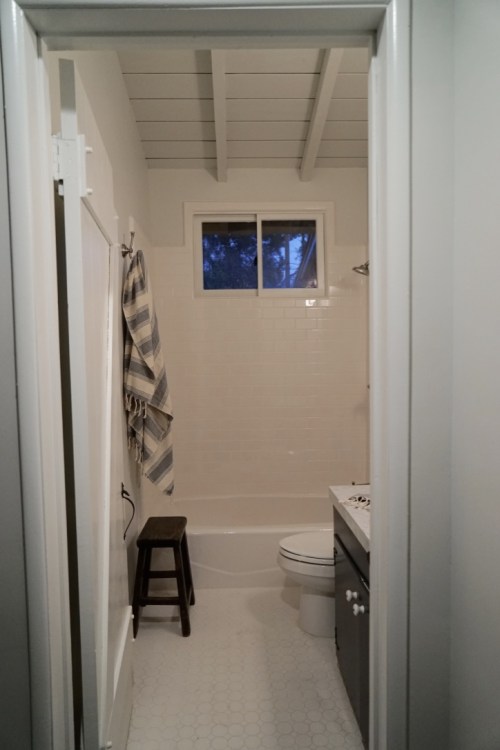
Hall Bath, After
With this bathroom, we kept the cast iron tub and just added all new subway tile. For flooring, I went with a ceramic tile from Lowe’s — it’s clean, classic and inexpensive. Since the vanity base was in great condition we kept it and painted it Hale Navy (by Benjamin Moore) to go with our marble countertop.

Initially I really wanted to go with a Calcutta marble slab in here but the slab would have cost $1,000.00. To stay within our budget, I decided to go with 12×12 Carrera marble tiles which costs just $80 (plus labor). We then added a new Kohler sink, faucet fixture, and toilet (always nice to replace those) — all from Lowe’s.

At some point the original brick patio was converted to a bonus room (above). This room has tons of potential with all its natural light, views of the garden and access to the patio. 
I really loved the brick floors and instead of covering them with a tile, I decided to keep the brick and just give it a good cleaning.

an old amazing cactus

hitching post

kitchen

vintage latch

mantle

Z style ranch doors
I only used two paint colors throughout the entire cottage, Paper White and Ice Mist both from Benjamin Moore. This way, with only a 1,200 square foot cottage the space feels much larger and it gives the home an overall cohesive look.
When rehabbing a house on a tight budget remember your biggest weapons are going to be paint and lighting. To keep costs down I pull tons of materials from hardware stores like Home Depot and Lowe’s. Another way to add charm is to visit your local salvage yard or flea market for some really good deals on unique items that will give your home that added character and charm. You can also visit my Pinterest board to see my favorite lighting choices from both The Home Depot & Lowe’s, as well as more ideas on decor and design.

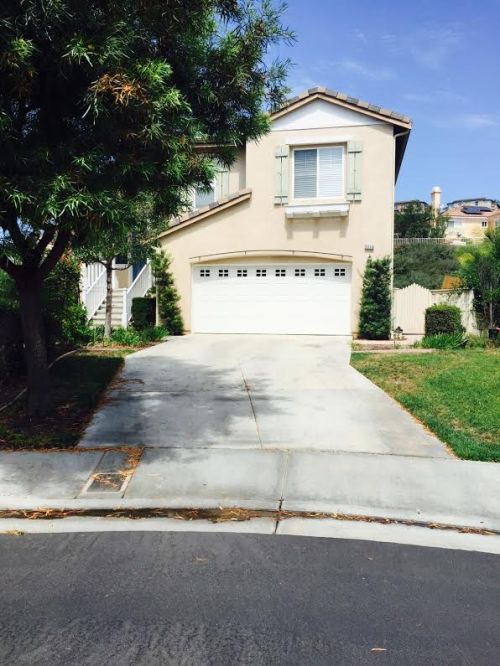
Whenever I do a project I always have a vision/direction for what I want the project to look like in the end. For this sweet cottage, my inspiration came from Ellen Degeneres’s ranch just north of Los Angeles (photo above).
In the end, this North Hollywood ranch was awesome to do — I really enjoyed bringing the charm and life back into this little piece of history. Once the exterior of the home is finished, I’ll post some before and after shots as well. Happy Tuesday!
Read Full Post »
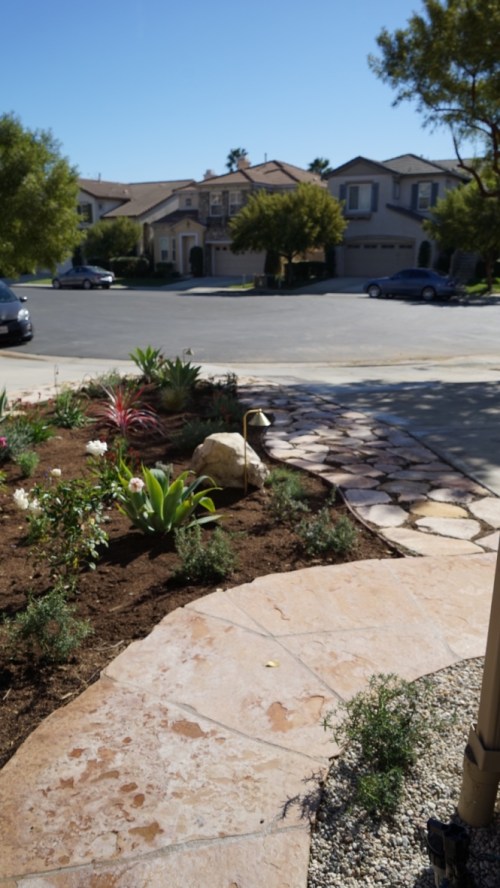
 Above, my inspiration behind this Long Beach project. I wanted to bring a bit of old world charm along with California influences to the exterior. In order to do this I brought in antique light fixtures, a water feature and wonderful easy Southern California plants like the iceberg rose and agave.