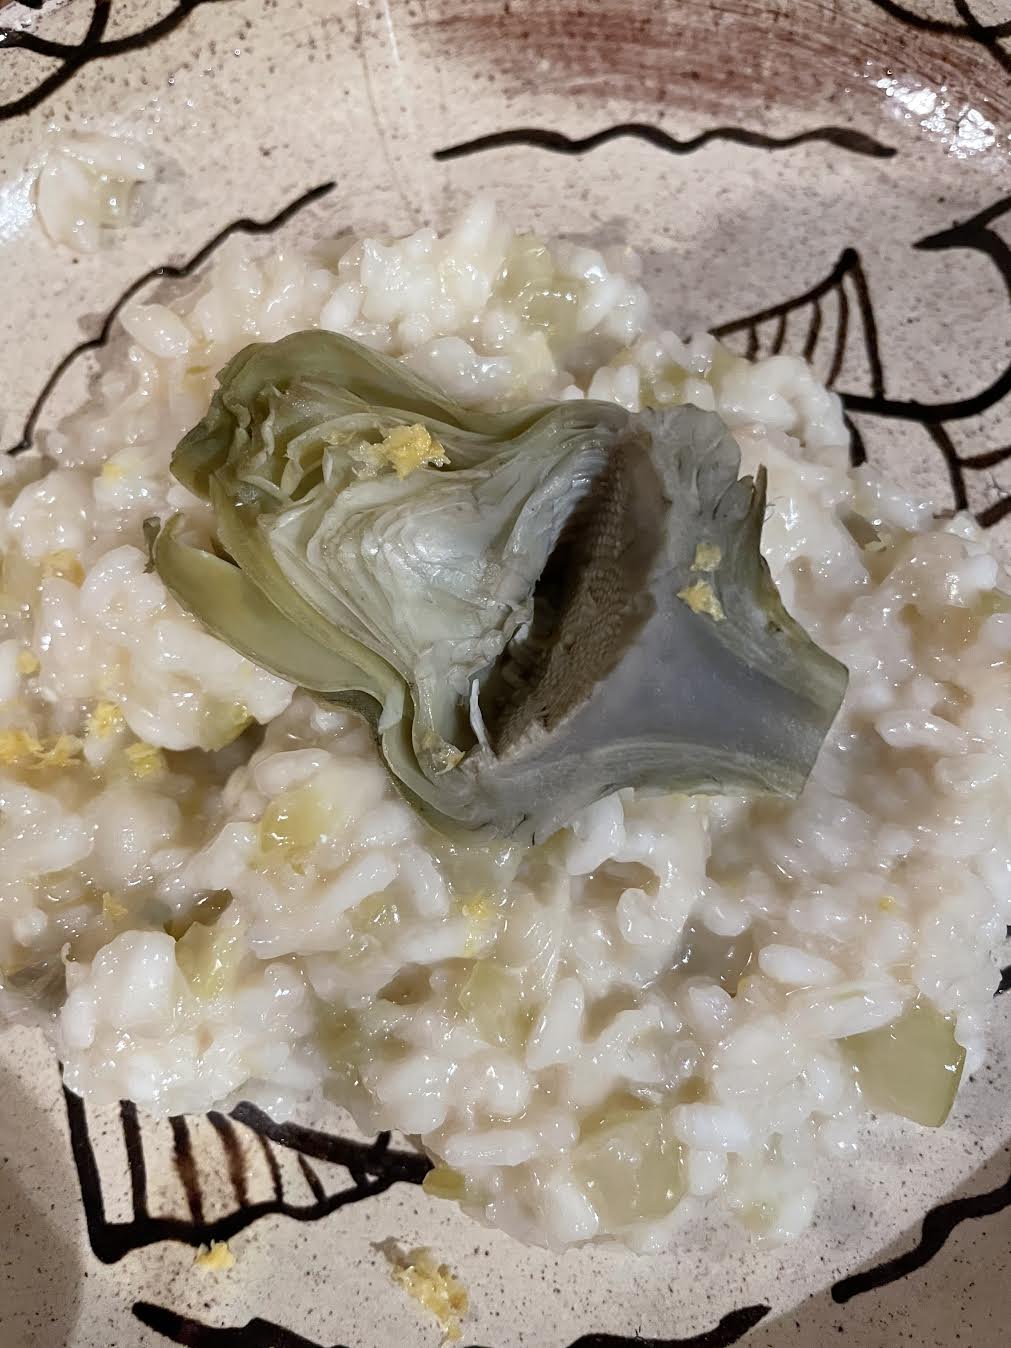
Feeds:
Posts
Comments

Archive for the ‘Gardening’ Category

During this time of year when it’s a bit cold out and I’m not truly able to garden, I feel like I need to do something that feels like I’m in the garden and getting my hands dirty. Therefore, I thought it would be fun to put together a succulent arrangement for dinner tonight. And, if I think it’s going to get truly cold, I can always bring it indoors until it gets a bit warmer.

So, I went to my local garden store and selected these succulents. I love the color and sometimes I think it’s nice just to use one variety.

I just planted them all in and then added gravel on top as a decorative element.

HAPPY SATURDAY!

Read Full Post »

I love a fig tree in the garden. Mine is a bit wild at the moment. I usually keep it nice and tidy but decided this season to just let it do what it wants. Even though this years figs aren’t extremely flavorful, I do love using the leafs for decor, especially for cheese boards.

Happy Saturday!

Read Full Post »

RISOTTO AI CARCIOFI

2 pints vegetable stock

2 tablespoons olive oil

a dollop of butter

1 large onion peeled and finely chopped

2 cloves of garlic, peeled and finely chopped

1/2 a head of celery, trimmed and finely chopped

2 cups risotto (Arborio) rice

2 wineglasses of dry white wine

5 tablespoons butter

4 oz. freshly grated Parmesan cheese

6 small artichokes

zest and juice of 1 lemon

sea salt and freshly ground black pepper

a small bunch of fresh mint, leaves picked

Stage 1: Peel the artichokes back to their pale, light leaves, then halve them and remove the hairy chokes with a teaspoon. Immerse the artichokes in water with half the lemon juice with a heavy lid or heat -resistant dish placed on top of them to keep them immersed and stop them from discoloring.

Stage 2: Heat the stock. Put the olive oil and butter into a separate pan, add the onion, garlic, and celery and cook very slowly for about 15 minutes without coloring. This is called a soffrito. When the vegetables have softened, add the rice and turn up the heat.

Stage 3: Drop your prepared artichoke halves into the simmering stock.

Stage 4: The rice will now begin to lightly fry, so keep stirring it. After a minute it will look slightly translucent. Add the wine and keep stirring — it will smell amazing. Once the wine was cooked into the rice, add your first ladle of hot stock and a pinch of salt. Turn the heat down to a simmer so the rice doesn’t cook too quickly and the outside. Keep adding ladle full of stock, stirring and massaging the creamy starch out of the rice, allowing each ladleful to be absorbed before adding the next. This will take around *15 minutes. Taste the rice to check if it’s cooked. If not, carry on adding stock until the rice is soft but with a slight bite.

Stage 6: Remove the artichokes from the stock pan and add to the risotto. Remove the risotto from the heat and add the butter and Parmesan, artichokes, toss with lemon zest and mint. Stir well. Place a lid on the pan and allow to sit for 2 minutes. Salt if needed.

*Cook’s note: This recipe is from Jamie Oliver’s book Jamie’s Italy. This is one of my favorite cookbooks. I’ve been using it forever and everything I make from this book is excellent! This is a very simple recipe but it always takes me longer than 15 minutes to make. From start to finish, I would allow an hour. I made it last night and it took me a while but I’m a slow cook because I always like to enjoy conversation and a glass of wine while cooking.

Serves 6

Read Full Post »

Happy Thursday! With tomatoes in season, one of my favorite ways to enjoy them is by making this simple yet extremely flavorful sandwich. This is my all-time favorite sandwich.

INGREDIENTS:

Baguette

Tomatoes

Fresh Buffalo Mozzarella

Fresh Pesto

Basil or Arugula

Salt

A baguette is perfect for this sandwich, but if it’s not easily available then any thick country bread would work.

Spread the pesto on both sides of baguette. Add the sliced tomatoes, salt the tomatoes. Stack the sliced buffalo mozzarella on top and add a little salt to the mozzarella. If you don’t have pesto then you can use a good olive oil.

One thing that I didn’t have on hand but would have been fantastic with this sandwich is fresh basil or arugula. Served with a fresh green salad and a small glass of chilled white wine and it’s the perfect lunch.

Read Full Post »

This was a wonderful project to work on! Not only was this project for a dear friend and fellow designer, Lisa Woolley, but this home had so many unique and charming elements that it really made the project an exciting one to do. Built in 1940, the home was originally designed as the “mother-in-law” home to the house next-door. Initially, the house had two entrances, one on either side of the home. A main design goal was to direct guests to the now principal entrance which was through the courtyard to the left. When I first saw the home, it really seemed to have an Old World charm about it so I decided to continue the theme. I used a lot of shrubs that could be shaped into conical and rounded shapes as the garden matured and chose shutters that were reminiscent of a home in the European countryside.

Before

Before

After

Above, some of the main elements that I wanted to incorporate into this project. I wanted a beautiful and strong trim color, so we went with ‘Iron Mountain’ by Benjamin Moore. I also wanted to use a rose shrub, in the front entrance, and went with a shrub called ‘Belinda’s Dream’. Not only does this shrub have wonderful blooms, but I thought is would look elegant as it cascaded over the nicely trimmed boxwood border.  I also kept many of the original boxwood for their sculptural shape and just trimmed them a bit. Lastly, I wanted to incorporate one of my favorite elements, lighting.

Above, a before photo of the courtyard. After removing the shrubs, I noticed a nook that would be a wonderful place for a seating area. I thought it would be perfect place for my client to enjoy a cup of coffee while watching her kids play.

After

Above, a before shot of the right side of the home with some wishes from my client.

After

Happy Friday! Have a wonderful weekend!

Read Full Post »

HOMEMADE PESTO

Happy Sunday! Today, I’m making homemade pesto because as the holidays get busier, it’s something I can grab from the fridge and easily put together. Add to your favorite pasta and you have a wonderful homemade meal in minutes. The recipe, so super simple, is below.

I also love using pesto with Caprese salad. Drizzle a little more olive oil on top for more moisture. Also, excellent on sandwiches.

THE RECIPE 

3 cups (packed) basil leaves

4 gloves garlic

1/4c pine nuts

1/4c walnuts

1c parmesan cheese

1/2c olive oil + a little more

salt

I just throw it all in a food processor and pulse until it reaches the consistency I like. This recipe serves four.

Enjoy!

Read Full Post »

It’s been about two years since we started this exterior project, and the design is maturing beautifully.  Many thanks to my wonderful clients who have done an incredible job keeping up the integrity and look of the initial design. We still have a phase two happening to the front, which I’m really excited about, but for now I’m very happy to share the latest. See before and after photos below.

After

Before

Before

After

Before

A sneak peek of the backyard, which we are still working on. Hopefully, we’ll be done by Fall 2020.

Read Full Post »

Since tomorrow is Palm Sunday, and the weather should be beautiful, I decided to invite some friends over for a late lunch in my garden. First step is to repot some planters that are in serious need of help.

One of the planters that needs some attention is this long narrow one that goes on one of my tables.

Yikes, here’s what she looked like before. Pretty sad, huh?

I went to a local grower this morning and grabbed some simple succulents that looked good together. When planting a mix of succulents, I like to take them all out of their pots and remove any excess dirt. Then I place them all on a tray so that they’re easy to grab once planting begins.

For this long planter, I like to place a large more dramatic succulent in the middle, as the focal plant, and and then just add the same succulent on either side for symmetry. Super simple.

Once I was done planting and filling with extra dirt, I added some gravel I had handy, but it’s not necessary if you don’t have any.

Happy Saturday!


Read Full Post »

unnamed-4

Like so many, I absolutely love the gardens in Provence! When I visited the region 5 years ago, I fell in love with this part of France including its gardens & slower pace of life. The beauty, simplicity, sophistication and disregard for contemporary ingenuity was beautiful to me. The effortless style drew me in and I tried to take notes of everything that appealed to me. I particularly loved the areas in the gardens which were designated for eating or entertaining.  The materials were so simple — an old farm table, rustic chairs and simple plantings all made up that certain feel that is so desirable for so many of us. Therefore, while remembering my Provencal vacation, I thought I would put together some simple tips on how you could create your own little South of France right in your backyard.

unnamed-5

Although, many of us don’t have a charming French farm-house or the amazing Mediterranean climate we can still obtain “the look” in our own backyard. It’s relatively easy, all you need is some space and a couple of items.

unnamed-7

STEP 1: SELECT THE AREA

First, figure out the area in your garden where you are going to add this little Provencal nook — preferably a shady part of your garden.

unnamed-11

STEP TWO: ADD GRAVEL

There are many types of gravel but the gravel usually used in Provence is similar to our ‘pea’ gravel.

(Click here, for a how-to video, from This Old House, on installing a gravel pathway (same steps would apply when doing a larger space). Also, click here for more examples of gravel spaces from Houzz)

unnamed-12

STEP 3: ADD TABLE AND CHAIRS

A place to sit and sip on a glass of Rose and enjoy a late lunch is always nice. I like a simple picnic table and benches but it can be really anything. Places, like Restoration Hardware, Ikea and Pottery Barn offer some type of “farm” table. If you don’t want to wait years to get an aged look, try Craig’s list for a used (weathered) teak or picnic table.

1a655e38bacaa9d823bb11e12a697f86

STEP 4: SELECT SOME SHRUBS

Of course, plants like Lavender and Rosemary are well know Provencal plants but there are tons more. Plants like Pittosporum, roses, salvias, and certain citrus are popular as well. If you don’t get full sun in your garden, or live in an area that doesn’t allow for you to grow Mediterranean plants then try plants that are similar. It’s really about working with the climate you are living in and using similar shapes and textures to Mediterranean plants. Also, these gardens tend to keep the plant list simple — using only several varieties of plants. Too many varieties and it becomes more of an English cottage garden. Your local nursery should give you the best advice on which plants would be comparable.

unnamed-14

STEP 5: ADD A LARGE PIECE OF POTTERY (OR 2)

Pottery adds a certain sculptural element, as well as a sense of history. (Restoration Hardware has some gorgeous ones at the moment)

unnamed-6

STEP 6: POUR YOURSELF A GLASS OF RICARD OR ROSE & ENJOY!

We all know it’s not really what you put outside but what you do with it or how you live in your space. Even if you only have a simple courtyard or balcony, the main thing is to take time with friends and family, pour a glass of wine or a cup of coffee & just enjoy the moment.

Cheers!

~ Shannon

Read Full Post »

urban11

Creating a garden in an urban setting might seem tricky, but actually it can be quite easy. Recently, I was asked about some ideas for a very small urban garden, so I put together 4 simple steps that could help anyone interested in planning a garden in the city.

urban2

Step 1: Figure Out Your Needs

Decide what you would enjoy most in your small urban space. Would you want an area to lounge around in, or would you rather it be more for entertaining? Would you like a sit down eating area? Do you need a place for a grill or maybe a water feature? Some of you may be able to include a couple of different areas, but for those with limited space, you may have to narrow it down to your 2 most important needs.

urban1

Step 2: Figure out the Arrangement

Once you figure out your needs for your urban garden, the next thing to consider is your layout.  At this point, you should have some idea as to what furniture/items you will be using in your garden space. Begin with an overhead sketch of your space and arrange your areas including any furniture/items you are wanting to purchase. By planning ahead and figuring out your arrangement, you might end up eliminating something that isn’t absolutely necessary, as well as avoid returning any items.

urban6

Step 3: Choose plants that fit your Lifestyle and Environment

If you have a busy lifestyle choose several large amazing plants/containers that make a statement and that are low maintenance — like proven shrubs, succulents and cacti.
urban4

Step 4: Set up your areas

This is usually everyone’s favorite part, seeing it all come together!

urban8

The picture above, of a very small courtyard, is a great example of using a small space wisely. The fig ivy on the wall for a bit of green, candles for ambiance, a love seat and chair for a conversational area, and a small table to place a book or beverage on. Perfect!

Other quick tips are:

lattice to help with any privacy issues,

fountains to drown out city noise,

& a mirror to make your space feel a lot bigger!

urban3The Ultimate Urban Jungle. A bit unruly but amazing at the same time. I can imagine parties out here would be quite wonderful.

If you would like more urban garden ideas, check out my board,”the urban garden”, on Pinterest!

Read Full Post »

%d bloggers like this: