Feeds:
Posts
Comments

Holiday Inspiration

I just lit another fire and have been up since the crack of dawn. I have been sipping on coffee and perusing some amazing boards on Pinterest. It’s cold outside (for Southern California) and I don’t want to move, however, I must get on with my day. A meeting with a client, work emails and Christmas shopping is calling me. Before going I thought I would share some of my favorite Holiday pics from Pinterest.

xmas2

xmas3xmas4

xmas5

xmas6

xmas7

xmas8

xmas10

Tomorrow – garage sales in Pacific Palisades and a tour of a friends garden! Happy weekend!

A while back I was asked if I had any examples of how to use succulents in a landscape. It can be a bit tricky to only use succulents because people tend to use the same textures and colors. The trick is to mix it up, using different height and shapes, as well as different textures and colors. For example, using a large Agave Attenuata or Barrel Cactus with Senecio Mandraliscae planted around it would be beautiful.

Below, I have collected a couple of examples.

succulent2

A great mix here — Kalanchoes, Senecio, Agaves, Barrel Cactus, Kangaroo Paws, and Sago Palms

succulent

They mixed shape, texture and color beautifully! (Barrel Cactus, Senecio & Torch Aloe)

succulent1

The color contrast here between the blue of the Echeveria and the green of the Barrel and Opuntia is stunning.

Succulents and Cactus are perfect plants and when mixed well they can produce a gorgeous garden with little maintenance.

Another great resource is Jammie Friday’s board on Pinterest called, Arid Garden.

My last post on this little cottage is the master bath and the upstairs family room.

Before

Yikes! I know, a bit ugly, but it’s amazing what paint, new flooring, a walk in shower and other essentials can do!

IMG_0714

After

This was a very simple and low-cost bathroom makeover. I gutted it except for the vanity base which I had painted inside and out. I used leftover marble tiles from my previous home for the countertop. When the new flooring was installed I opened up the shower completely and used subway tiles throughout. I also had my contractor change the lighting from overhead fixture to wall sconces (with dimmer). A new toilet, faucet fixture, towel rack and medicine cabinet finished it out.

The Upstairs Bonus Room

IMG_0135

Before

Sorry for the blurry picture but when the cottage was purchased the lighting was quite bad.

IMG_0777

After

This was a really fun project and I can’t believe I was only able to enjoy this home for 7 months! Now, besides a project still in the works in Austin, I am busy trying to work on my little home here in Los Angeles. I will hopefully post some pics soon!

Sorry for the delay in getting the before and after photos of the den posted. We just moved back to California and it has taken a while for me to get settled.

The Den

Before

After

This room turned out to be my favorite in the entire home. It was sunny and cheerful all day and had great views of the backyard. Next time, the family room and master bath.

Thanks for checking back!

The Kitchen

Before

Not a pretty sight at this point, but I  knew there was potential somewhere in there

During the project — when the plumbing was being moved and the frame-work was going up

After

Next time, the den!

This house had been abandoned and neglected for a while. It needed tons of work, but I did see potential in it. It reminded me of an English cottage, and I knew with a little love and a good contractor this little house could be a home again. Below are some before and after photos of this little cottage.

The Front of the Home

Before

The home is situated on a little hill and has a second floor, however, in this photo (above) it’s hardly visible because of the overgrown oak tree.

During

The “during” phase is usually the most difficult one —  when you are trying out paint colors, the house is gutted, and there’s no end is in sight.

After

Before

After

The Back of the Home

Before

After

Next time, before and after photos of the interior.


Several months ago, I did a blog entitled “Le Chic Shack” and bravely included a photo of my own not so chic shack at the time. It was, as most of you saw, quite horrible. However, with some paint and a plan it is starting to take shape.

I painted the exterior of the shed “Soot” by Benjamin Moore, the same color as our home so it acts as an extension of the home. This wonderful little shack functions as a place for researching future projects and relaxing with a cup of coffee. I still need to landscape around the shed and paint the interior a light gray.

Tomorrow, how to pot a simple succulent.

~ Shannon

— is the “Split-Leaf” Philodendron!

I love this plant! 

I have 2 in my home, one by the fireplace…

…and one in the living room

Another great thing about having a philodendron inside (or outside) your home is that you can take clippings!

There are countless varieties you can use in your home. The big box stores have several varieties in their garden centers and they usually cost around 10 dollars. What I love, is that for 10 dollars you bought something that can last for years and brighten up any spot in your home.

For care: they love bright light and watering just once a week

The client’s wish —

a rock garden with cactus and as little maintenance as possible.

Before

After

Every garden needs a focal point. With this courtyard, since it was long and narrow, the focal point is a floating bed centered in the middle. We used Barrel Cactus and Agave for both the low maintenance factor, as well as for their sculptural element.

As this garden matures the perfectly shaped barrel cactus will continue to grow wider and a bit taller, while the Agave will reach up to 4 to 5 feet — demanding quite a presence.

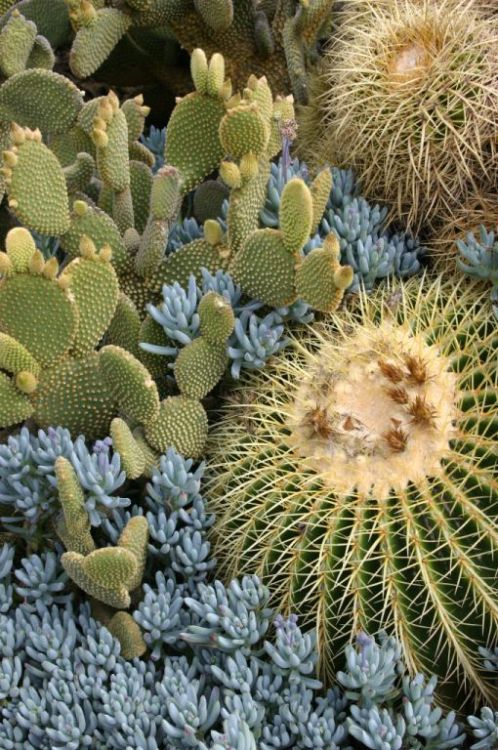
The Golden Barrel Cactus, Echinocactus Grusunii

Red Barrel Cactus, Ferocactus Glaucescens

Red Barrel Cactus and Agave

At the end of the garden, Red Colorado boulders were added for color and interest.

For this garden we kept the plant material minimal, however, they are picked with purpose. The cacti supply that wonderful sculptural element while the Nandina (above) serve several purposes. As the Nandina mature they will spread out creating a screen masking the home’s foundation and electrical boxes. They will frame the courtyard, directing one’s eyes towards the focal point bed in the middle, and, they will help soften the overall space.

Thank you to the client who was wonderful to work with, and to Perry Shankle with Perry Shankle Landscaping, who put all my ideas into motion!

Le Chic Shack

A while back a friend sent me a link from the New York Times. A story about an amazing little shack outside Paris (photo above) — a family’s retreat from the city — a weekend getaway. I admit it was quite inspiring to see/read. It made me think of some of us that might already own a potential chic shack just outside our back door. A garden shed, green house or tool shed that can be transformed into a wonderful getaway. With a little paint, an imagination (and possibly a really good carpenter) anyone of us could have our very own chic shack. Maybe not outside Paris for most of us, but something small and meaningful just steps away.

Another photo of the family’s getaway outside of Paris

Below, are some ideas to give us all a little inspiration in creating our very own chic shack. Enjoy!

An amazing cottage-style one

Island style

A modern take on one

One of my favorites!

A camouflaged one

Another modern one that opens up nicely to the garden

A very handsome one

Some might recognize this one as it belongs to the Barefoot Contessa

I apologize for the poor picture but had to include this one. It is one of my favorite garden pictures and possibly my inspiration for my own shed to chic shack makeover (photo below). It does take one in and you wonder what kind of fabulousness goes on in that little gem.

My own (the rusted thing way back there), “under construction”. Not very chic at the moment (recently moved in) but with a little paint, some landscaping, etc. it could turn out quite nice. In a month or two I’ll post an update.

*photo credits – New York Times and houzz.com